Documentation
The current version of the application is 3.0.2.
The current version of the add-on is 3.0.16
Before installation, please ensure that your systems meet the minimum requirements:
- ExpressionEngine 3.0 or later
- PHP 5.3.10 or later for the add-on
- Mac OS X 10.11 or later for the application
Mountee is also available for ExpressionEngine 1 and ExpressionEngine 2.
Installation Instructions
- Download Mountee.zip and unzip it.
- On your ExpressionEngine site, install the Module:
- Upload /mountee_3/ to /system/user/addons/.
- Navigate to Modules ->Add-Ons in your EE control panel and install the add-on.
- Enter your license number in the add-on settings.
- If you have been using ExpressionEngine’s file sync, you should synchronize templates and switch this feature off. (View Knowledge Base article for details)
- On your WordPress site, install the add-on:
- Navigate to Plugins -> Add Plugin in your WordPress control panel.
- Upload mountee3-wp-addon.zip.
- Navigate to Mountee on the Installed Plugins page and enter your license number in the plugin settings.
- Install the Mac OS X App by moving the app to your Applications folder
NOTE 1: ExpressionEngine’s Template Versioning works with Mountee; in fact, that’s one of its strengths. If you want to keep revisions of templates, you can enable this feature here: Developer → Template Manager → Template Preferences → Save Template Revisions.
NOTE 2: Mountee keeps a local cache of your templates in memory. This is part of what makes Mountee so much faster than editing over FTP, but it means that if you change your templates through the ExpressionEngine control panel while Mountee is connected, you will need to disconnect and reconnect to get the latest changes. If you only edit through Mountee this won’t be a problem.
Using Mountee
Connecting to your site

- Launch the Mountee app.
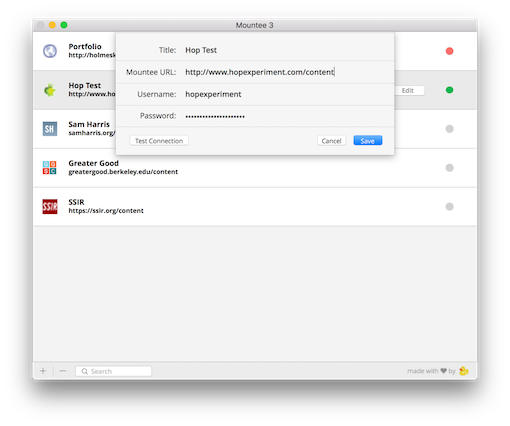
- Click + to set up a new site.
- Enter your site’s special Mountee URL — this is not the same as your Control Panel URL. You get the URL from the add-on settings page.
- Enter a username and password for your site that has permission to edit templates. Superadmins, for instance, have this access.
- Save your Mountee site.
- Click Connect to mount your site’s templates as a drive.
Using the Mountee File Preferences

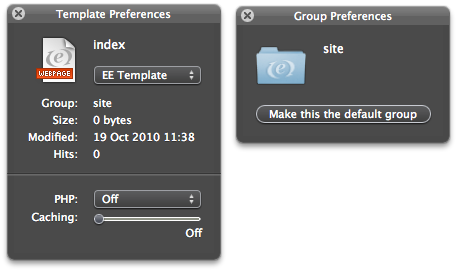
Once Mountee is connected to a site, you can open the Mountee File Preferences from the Finder by right-clicking a file and selecting Mountee File Preferences. Or, use the keyboard shortcut (⌥⇧⌘I).
The same keyboard shortcut can be used from within your editor, if you’ve installed the relevant plugin.
File Extensions
Mountee automatically adds virtual extensions to your template names in the Finder. These extensions only appear in the Finder; they don’t carry over to your real template names in your CMS.
The extension added by Mountee is determined by the template type and is mapped as follows:
- webpage → .php
- feed → .rss
- xml → .xml
- static → .html
- javascript → .js
- css → .css
When you create new templates with Mountee you should add one of these six extensions so that site handles your templates appropriately.
If, for any reason, you really do want your template names to have extensions, you can add the extension twice. E.g. a Mountee file named “style.css” would be named “style” in your site’s template list. Naming your template “style.css.css” stores the template as “style.css”.